
The year 2013 has already felt jammed packed with adventures and celebrations, but by far one of the best things to happen yet is the birth of Baby T. Baby T is the newborn of Crafty Mariko, one of our best friends. Linz and I have immediately fallen in love (her in person, me from a far) with this beautiful babe. We could not be happier for Mariko and her husband.
I knew that I would not be able to attend Mariko’s baby shower in person, but wanted to contribute a little something in my place. The shower was nursery rhymed themed and I thought some onesies inspired by Mother Goose stories would be a cute addition. I first saw a tutorial for this idea on Happy Together. I am amazed at just how easy it is to make custom onesies.
Supplies:
-Freezer Paper (this is the key to whole operation)
-Fabric Paint
-Fabric you want to paint design on (in this case onesies)
-Sponge Brush
-Pieces of Cardboard (for under the fabric you are painting)
-Exacto Knife
-Iron

Step 1: Pick your design. I used these clipart images for my Mother Goose theme. Adjust each picture to the size you want and print. Trace over the imagine with freezer paper, make sure you do this on the correct side. The instructions on the freezer paper box will say which side you iron onto the shirt, so trace on the other side of that. You could of course free hand your design, which I think would be awesome. Getting kids to draw on freezer paper to make their own custom shirts is another great idea.
Step 2: Use an exacto knife to cut out your imagine. This part is a little tedious, but the results are worth it. When picking am imagine remember the more detail and corners you trace you then have to use the knife to cut it out. I tried out a lot of designs and was dubious about the results of the more detailed pictures, however I was pleased to discover that as long as you iron on the freezer paper, paint will not leak out.

Step 3: Speaking of ironing, the next step is to place the freezer paper on the fabric and to iron it in place. Like I said before, make sure you get all the edges so the final look will be crisp.
Step 4: Place a barrier, like cardboard, between the fabric and the other side of the shirt. I wanted to make a bunch of designs for this project, but wasn’t keen on buying a ton of paint. Thankfully my days in primary school paid off and the tried and true method of mixing colors worked. I purchased yellow, blue, and red paint and was able to also make green and orange. I made these shirts before I was aware the gender of Baby T, but also knew that Mariko would appreciate some gender neutral clothing. If you were going for more stereotypical “girly” colors you could also easily make purple and pink with this method.

Step 5: Paint away. It really is that easy. Once you let the fabric dry make sure there are no spots you need to touch up.
4 and 20 Blackbirds
I really loved doing this project. I might have even gone a little overboard. I bought two packages of onesies in different sizes and painted them all. I don’t know that much about babies, but I hear they are messy and are constantly growing, so I figured extra onesies couldn’t hurt.
3 Men in a Tub
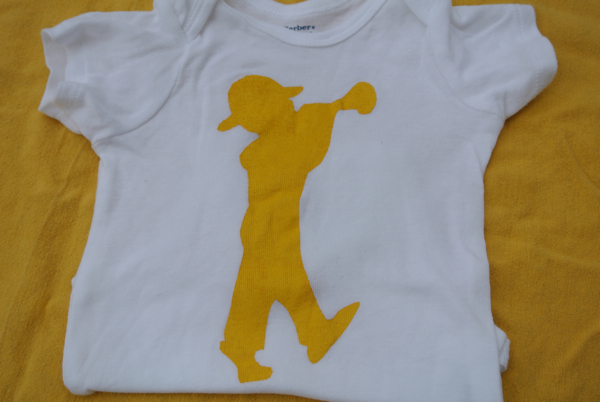
Little Boy Blue
Cat and Mouse
Muffin Man
Looking for more ideas to make adorable onesies to dress babies up in? Mariko made some cute musical ones worth checking out.


February 4, 2013 8:44 pm
I love these onesies and I can’t wait for Baby T to grow big enough to fit into them!
February 5, 2013 7:12 pm
Yay!
February 7, 2013 4:08 pm
Reason #157 why I need to pick up some freezer paper and make my own stencils! These turned over fabulously. I just got a Silhouette for Christmas, so I really have no excuse for not taking this project on. Everyone and their mother seems to be pregnant right now, so I have plenty of gifts to make. Thanks for the inspiration, Jess!
February 7, 2013 4:33 pm
Lauren, it really is such an easy (and inexpensive) way to make homemade gifts. If you try it out, I loved to hear about it.
February 15, 2013 12:13 pm
Oh wow, this looks great. I wonder if they sell that stuff in Australia!!
The cat and mouse is so cute!
February 15, 2013 2:33 pm
Thanks Talitha. Hmmm, I’m curious if they have freezer paper in Australia too. If you find some and try a project, I would love to hear about it.